WHAT IS THIS? SOME THEORY HOW TO CREATE ONE?
The StarTRACKER is a DIY equatorial mounting for night sky photography.
To take long-exposure astrophotos of objects that are too faint to be seen, you will need a polar-aligned equatorial mounting that allows you to track the stars during its exposure to compensate the Earth’s rotation.
BELOW: An example of the advantages of using a sky tracker
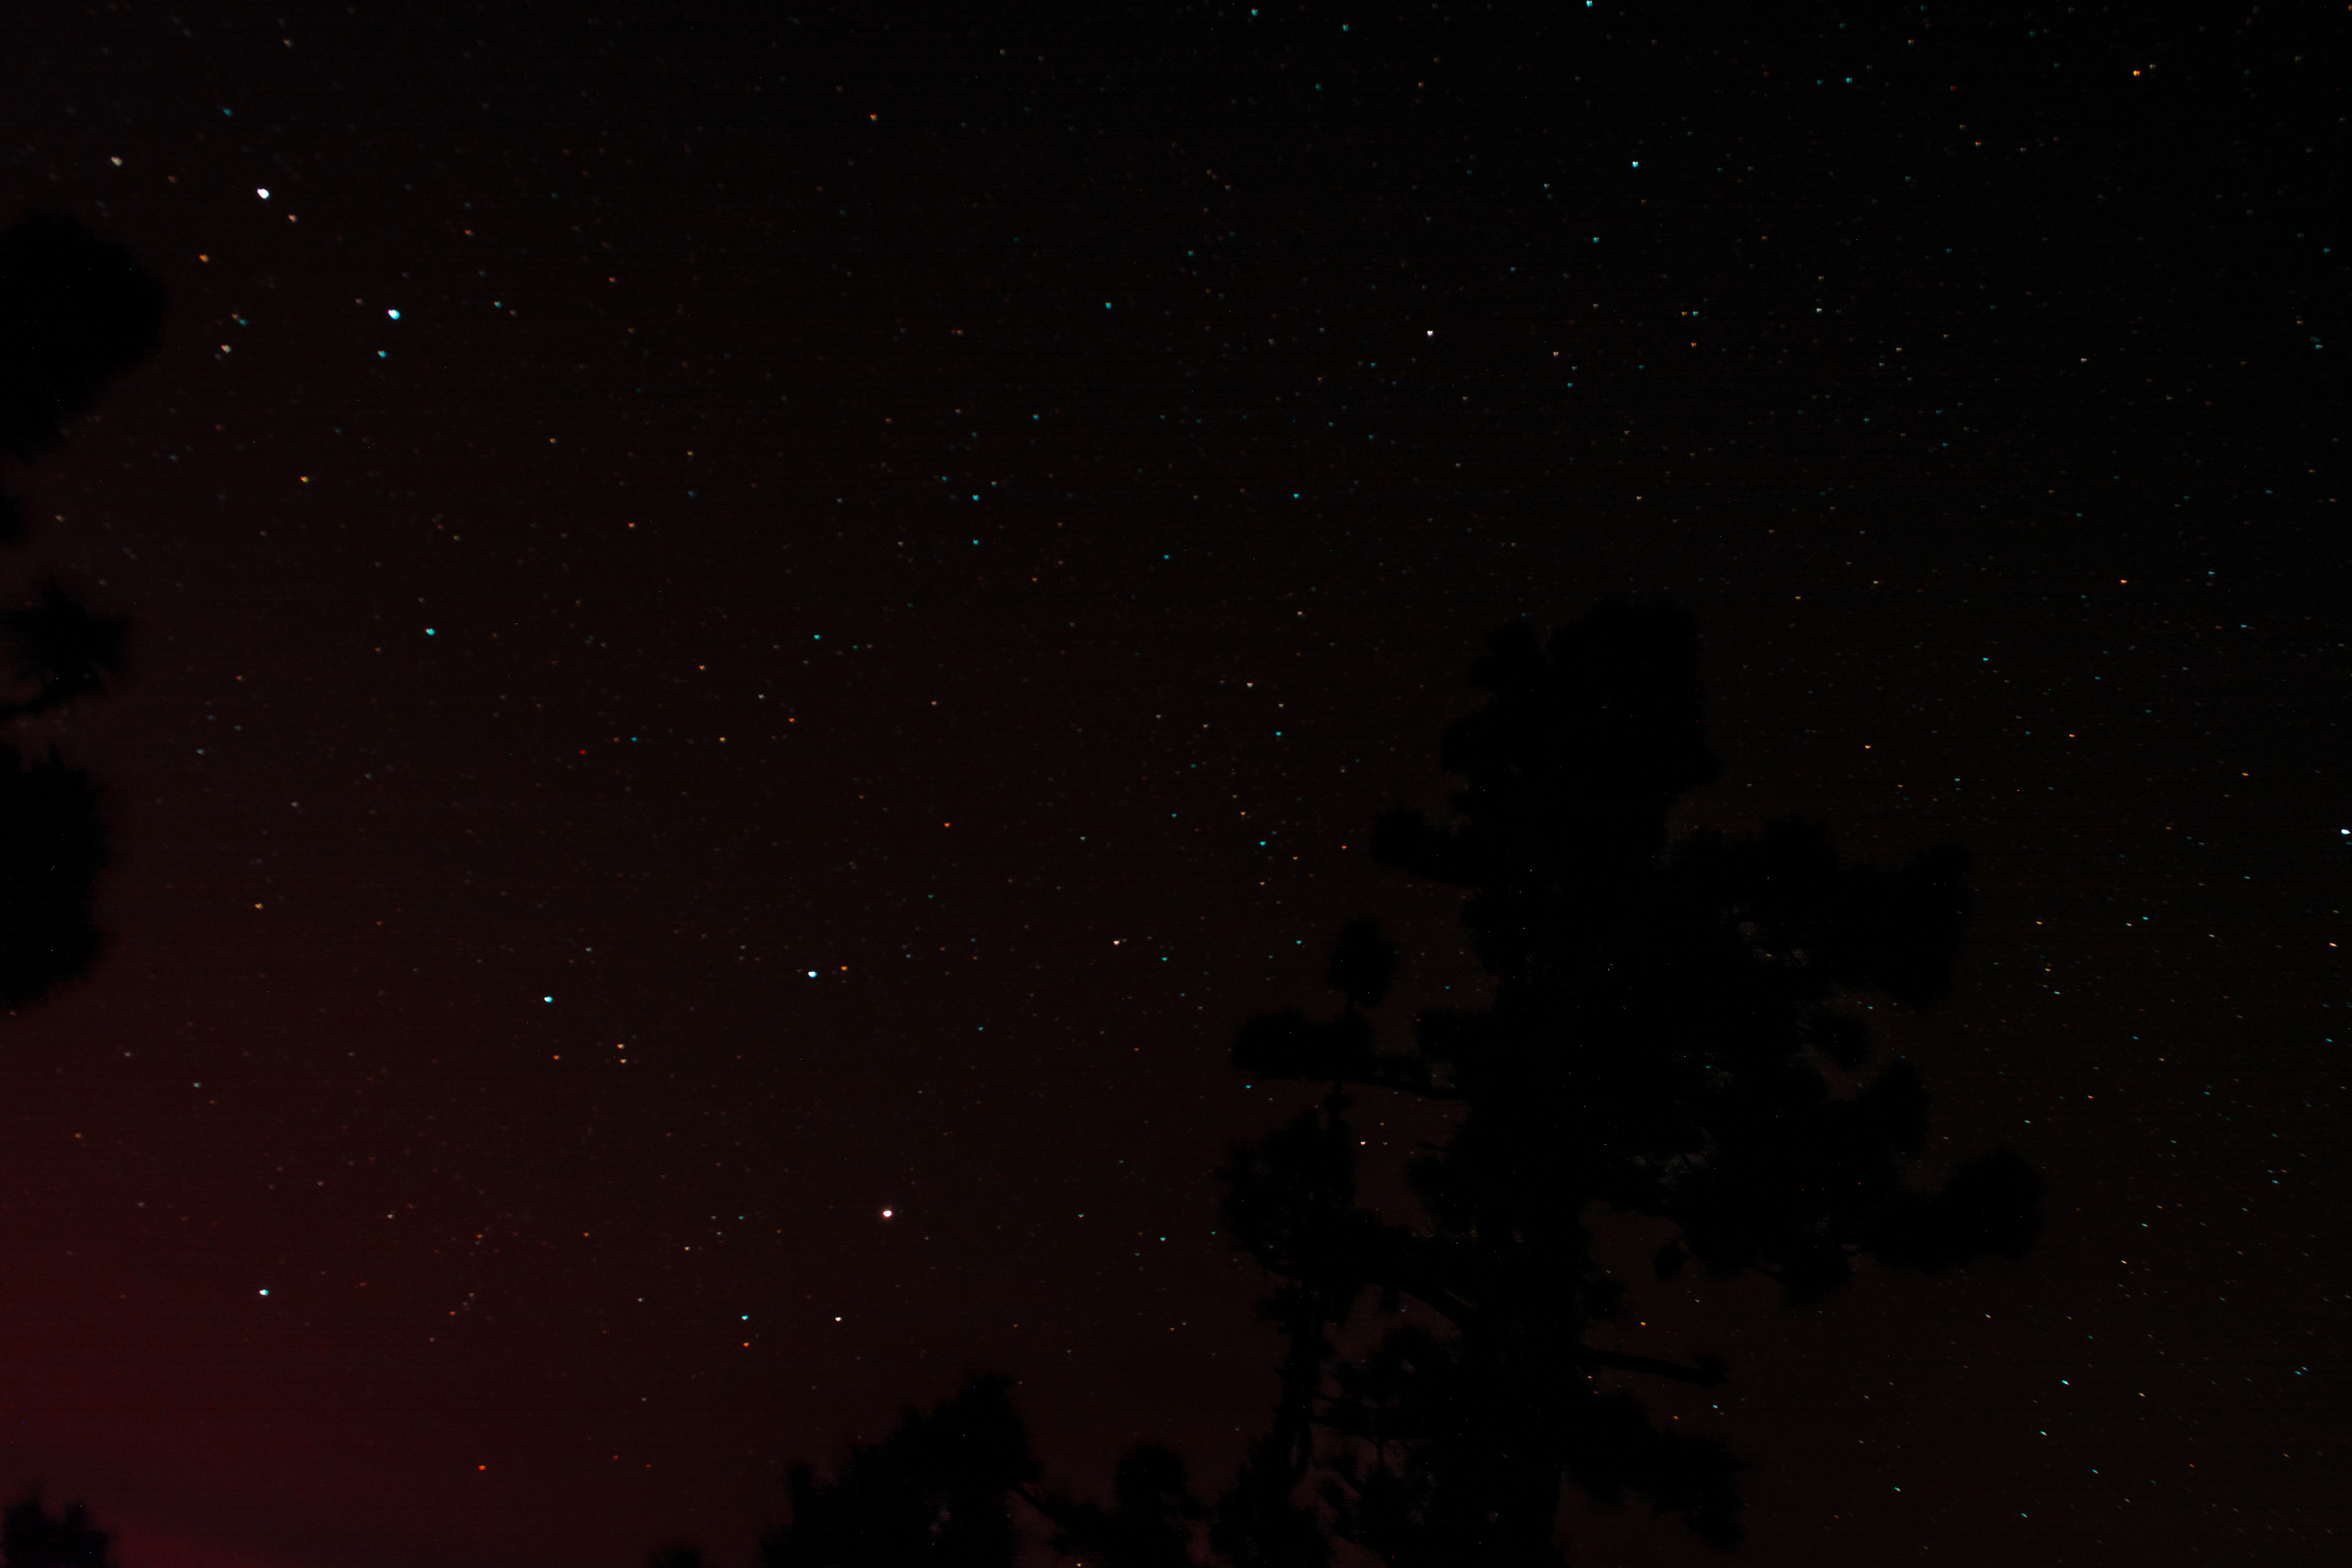
Without the StarTRACKER
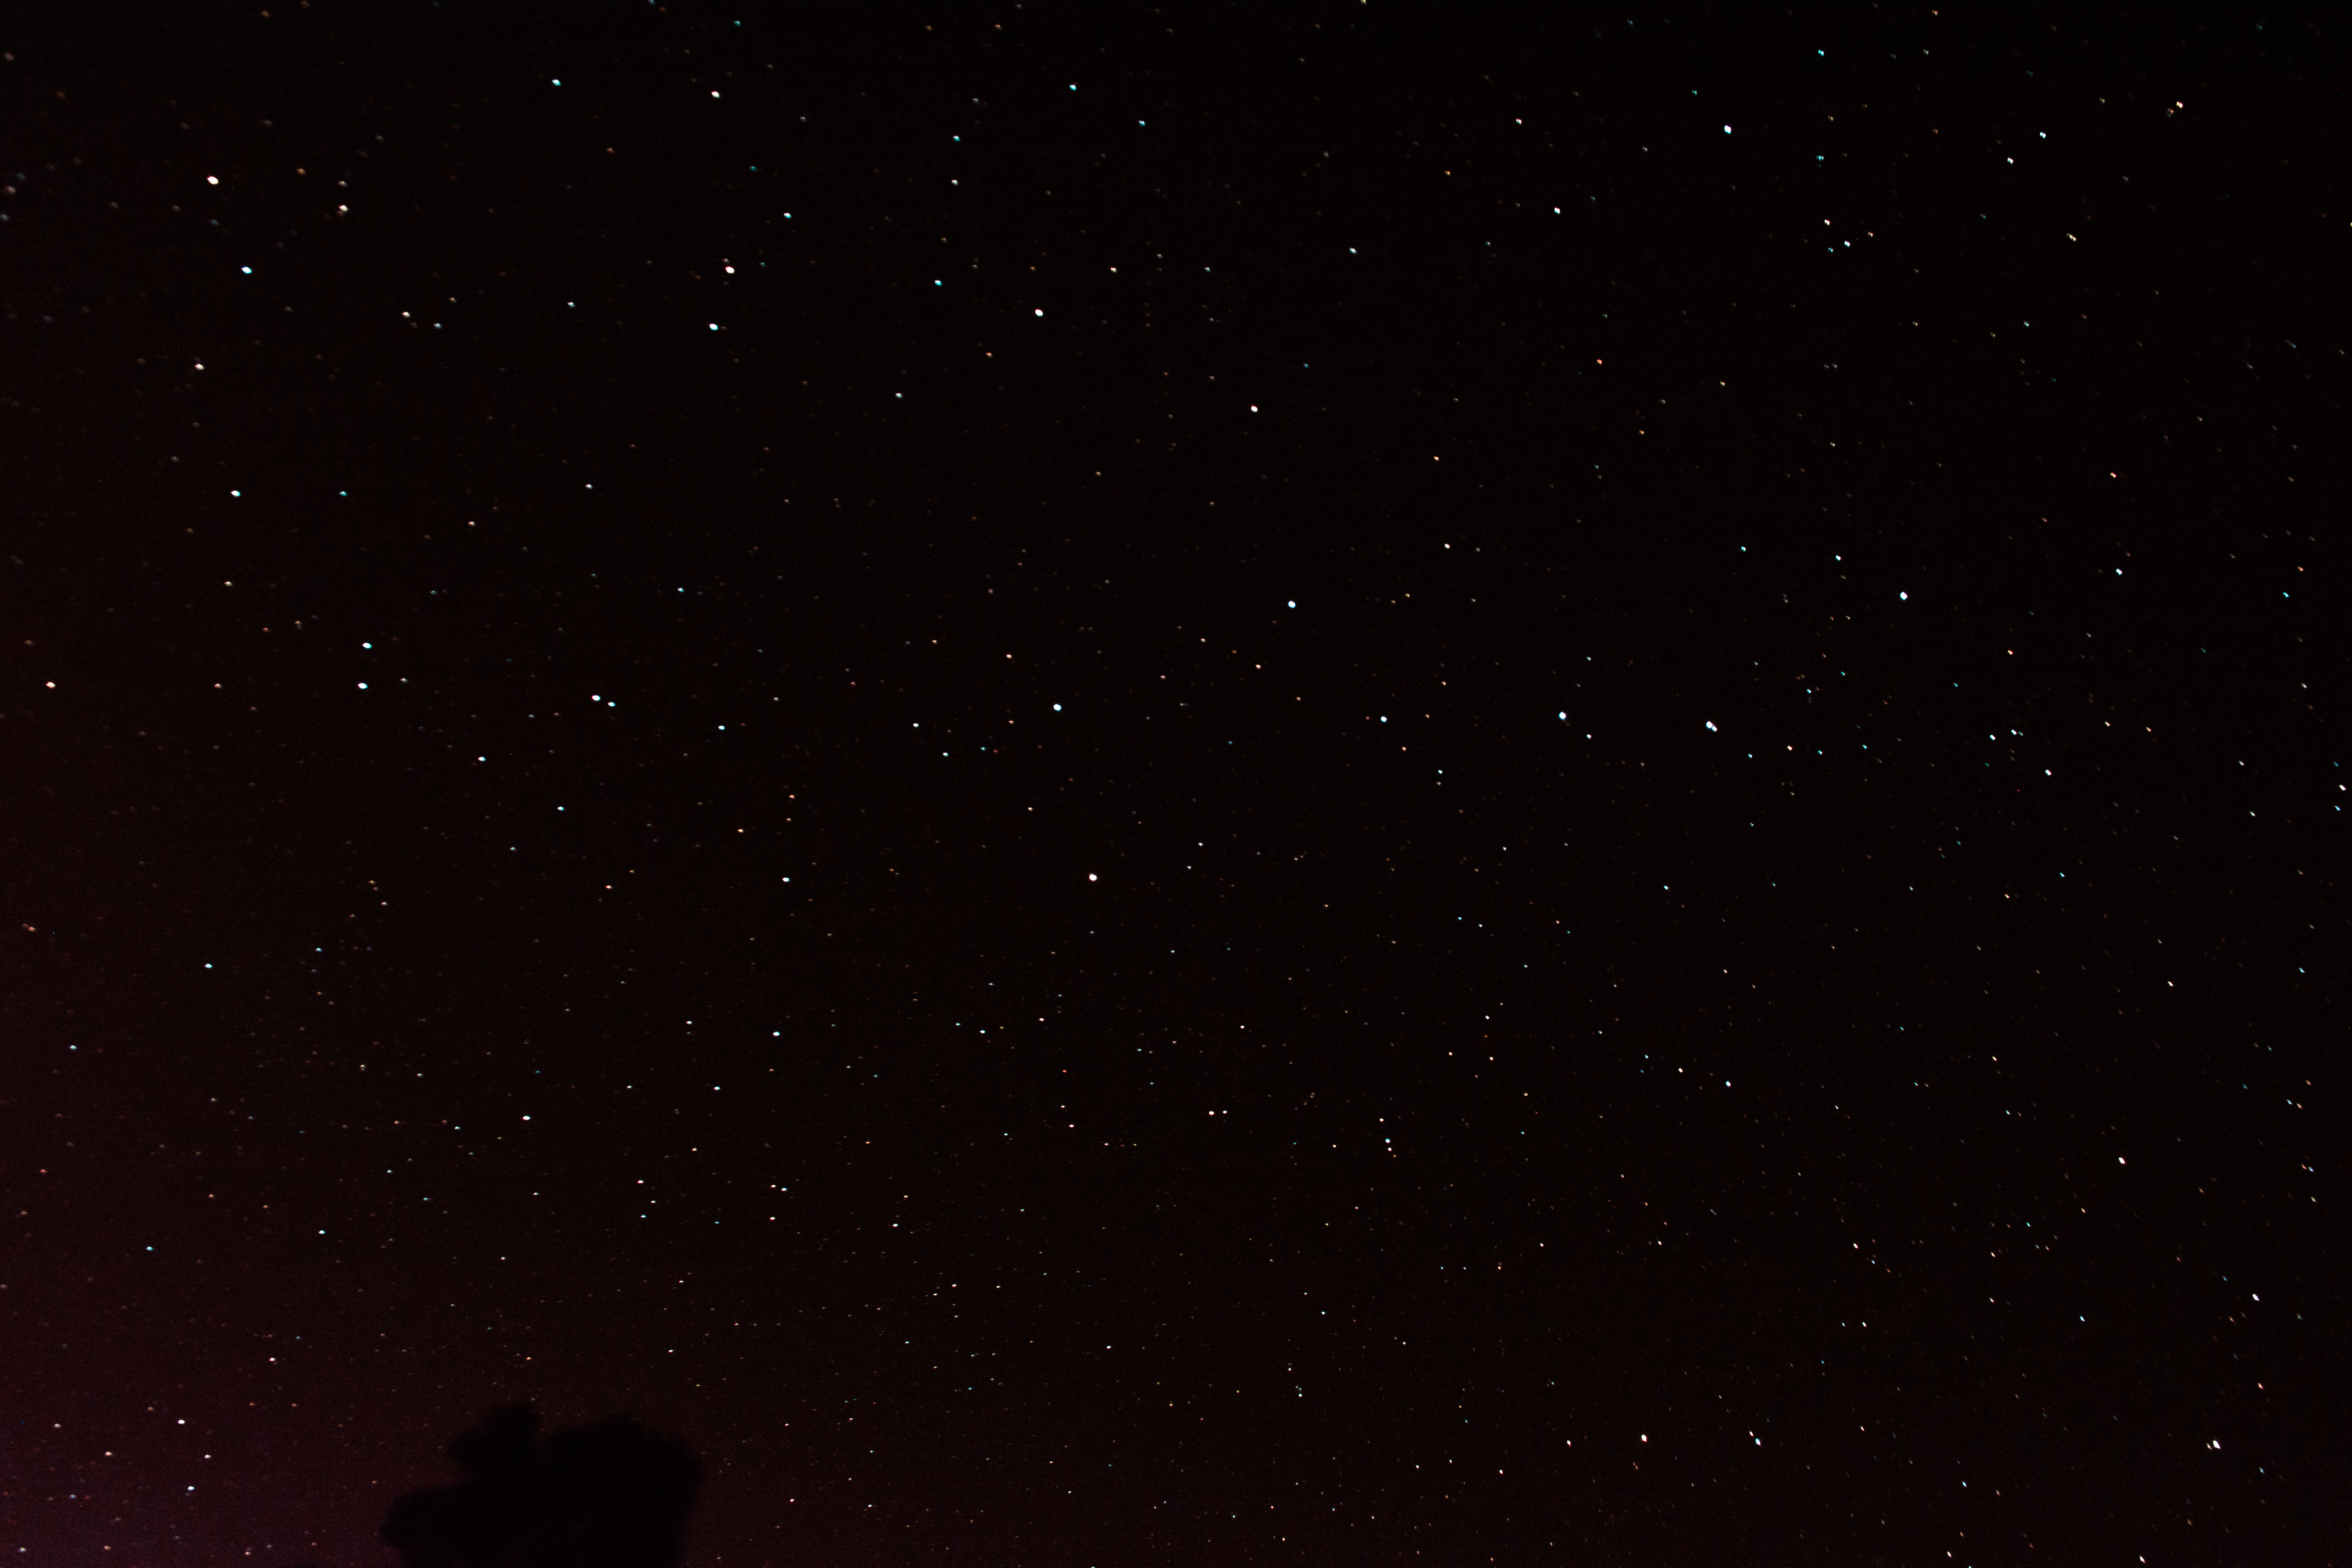
Using the StarTRACKER
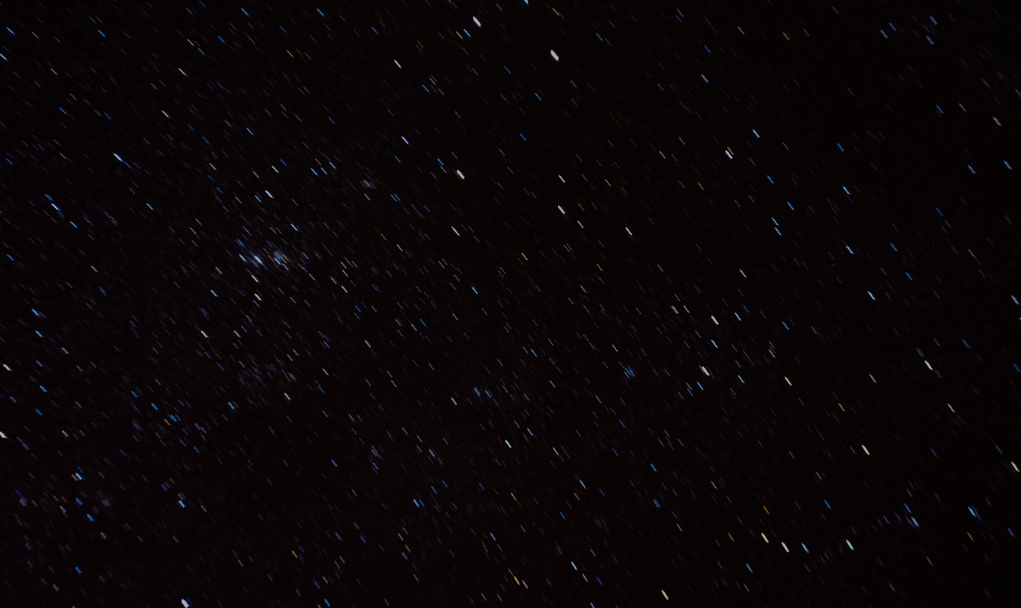
BELOW: Another shot (the Milky Way is visible in this one)

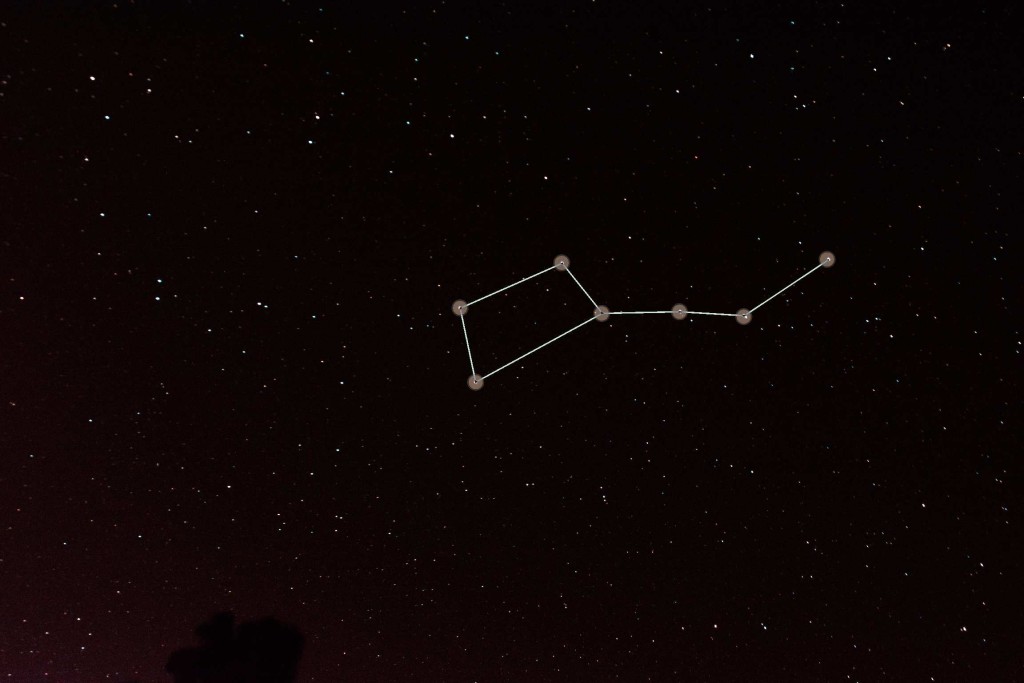
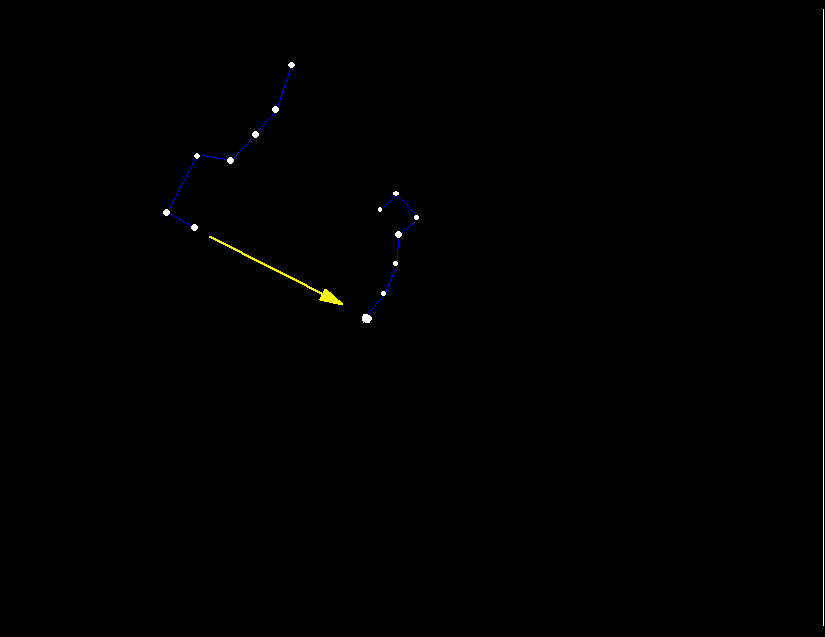
Question: Can you find the Ursa Major in the photo below?
Where we took these photos
but, What is the StarTRACKER?
The StarTRACKER is a device that will help your camera to take photos of the objects in the sky that are too faint to be seen. With a StarTRACKER you will be able to take good photos to up to 5 minutes without noticing the stars’ relative movement .
The StarTRACKER device has one axis aligned in parallel to the axis of rotation of the Earth by pointing it at the North or South celestial pole. Then, to compensate for the Earth’s rotation, the mount and camera are moved in this axis, using some electronics and a stepper motor that turns the mount at the same rate as the Earth’s rotation.
Luckily, very close to the North Pole there is a bright star, the Polaris. We can use this star as a perfect reference to align our tracker system. (Cool!)
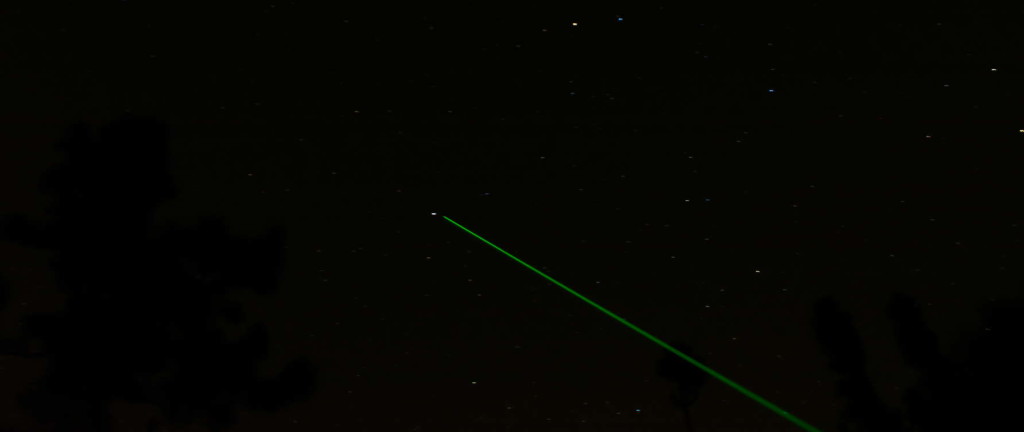
Below: A representation of the StarTRACKER aligned to the Polaris (Photo took in order to show how all the stars are moving around the Polaris). Exposure time 5 min.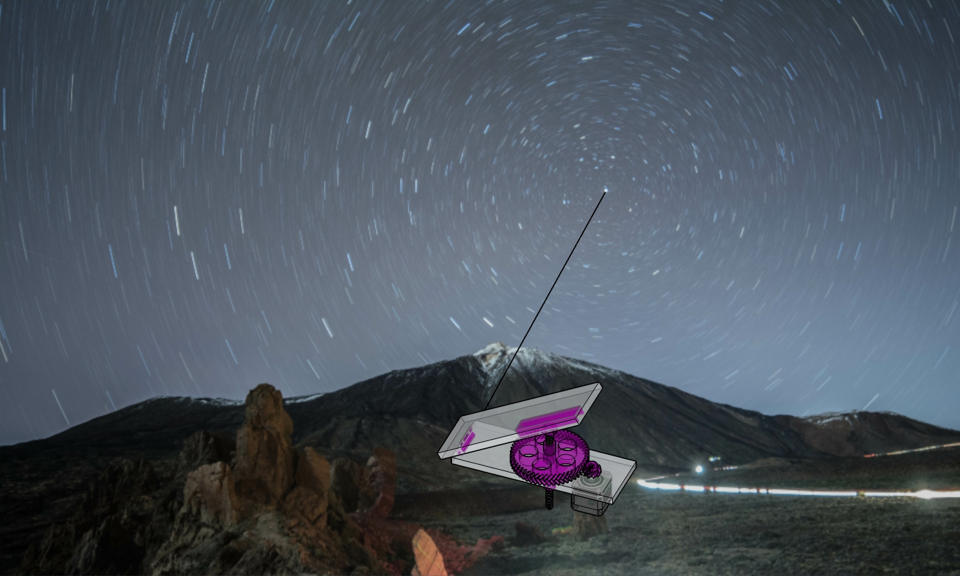
The StarTRACKER needs to be mounted on a tripod and our camera on top of our “star follower”. Then point it to the sky/constellation we want to photograph. Once an object is found, we need to start tracking the sky by turning the StarTRACKER on.
How does it work?
Before taking photos, we will need to:
1) Mount the StarTRACKER on a tripod
2) Align the StarTRACKER to the Polaris Star (in the North Hemisphere)
3) Point at the constellation/ zone in the sky you want to photograph with the camera. Start tracking. Take photos with long exposure (up to 5 minutes)
SOME THEORY
How Do I Find Polaris?
Polaris is located in the Ursa Minor constellation. Often, Polaris is not very bright and can be challenging to find. Polaris is easier to find by locating the seven stars of the Big Dipper in the constellation Ursa Major Constellation, or Big Bear. These stars form a small bowl with a long handle. Follow the stars of the Big Dipper from the handle to the side of the bowl, to the bowl bottom, and up the other side; the two stars forming the second side, Dubhe and Merak, point to Polaris. Take the distance between Dubhe and Merak; Polaris is the bright star that sits about five times that distance away.
A helpful video about how to find the POLARIS (and other constellations too):
HINT: Using a laser as pointing device:
One of the StarTRACKER 3D parts is a sort of small pipe that can be used to align the mounting plate to the Polaris star. This “visual” method is not very accurate, so we could use a laser to do this instead. We just need to fix the laser parallel to the hinge.
This allows you to orientate the mount to the Polaris star easily. There is a 3D part in the Startracker´s set created for this: the laser pointer support.
Is there a South Star?
While there are some distant stars close to the south celestial pole, there are no easily observable ones. The south celestial pole lies in the Octans constellation, and the closest stars in that constellation are very, very dim to the unaided human eye.
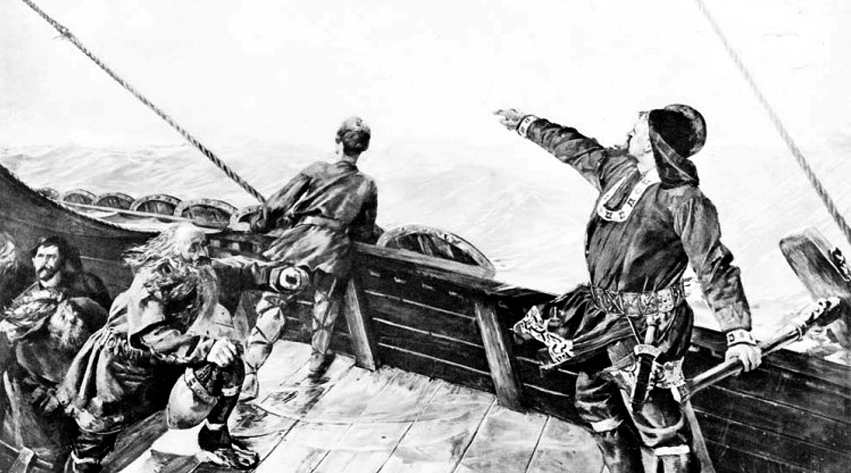
Why is Polaris Important?
For thousands of years, navigators have used Polaris to guide them to and from their homeports. Sailors still use Polaris for celestial navigation, and modern astronomers often use Polaris to help them align their telescopes. For any given viewing location on Earth north of the equator, Polaris’ position does not change through the night or the year. It marks Earth’s north celestial pole.
If you stand at Earth’s north pole, Polaris is directly above you. If you stand at the equator, Polaris is on the horizon. If you are at a location between the north pole and the equator, Polaris occupies an intermediate position above the horizon. In other words, Polaris is a useful marker to help you determine where north is, and at what latitude you are located. Your latitudinal position is equal to the elevation above the horizon. At the north pole (90 degrees latitude ) Polaris is overhead at an altitude of 90 degrees. At the equator (zero degrees latitude) Polaris is at an altitude of zero degrees. The same is true for any location on Earth. The Polaris can not be observed from the South hemisphere.
Will Polaris Always Be “The Pole Star?”
No. Today, Earth’s axis points just a little away from Polaris; Polaris is conveniently close to the north celestial pole and can be used in the context of the “Pole Star.” However, Earth’s axis wobbles; it points to different places in the sky. This wobble is small and slow, with a cycle of about 23,000 years. Earth’s pole is actually slowly moving closer to pointing directly at Polaris. It will be closest to Polaris in approximately 100 years and then will begin to move away from the star. About 4500 years ago, the north celestial pole was located in the constellation Draco. Calculations suggest that in about 10,000 years Earth’s axis will point to Vega, in the constellation Lyra.
TIP: Vega: This star was a main protagonist in the movie Contact
Well, that is cool, but…
HOW TO CREATE A STARTRACKER?
A) What you need. MATERIALS:
1) Two wood battens (two pieces of approximately 80x220x20 mm) to create the main structure. Could be larger or smaller if you want. But keep in mind that the structure has to be sturdy enough to hold the camera.
2) 3D printed parts (can be purchased here or printed by yourself)
3) A good, solid hinge (size depends on your chosen wood battens)
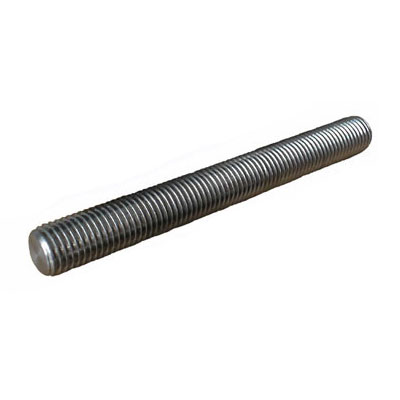
4) A threaded rod (a M8 rod has a pitch of 1.25 mm. That means, the rod will come up 1.25 millimetres every completed rotation). The 3D parts are made for M8, but could be adjusted to M6 or M10.
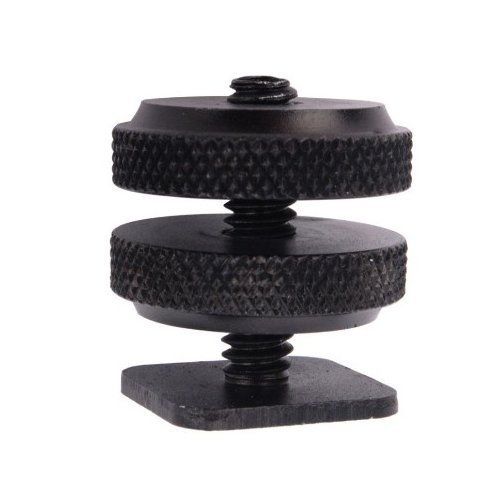
5) Type 1/4″ Tripod Screw to Flash Hot Shoe Adapter + Adjustable Swivel Angle Ball head
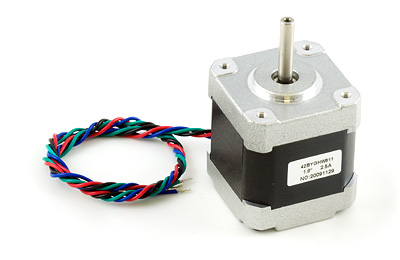
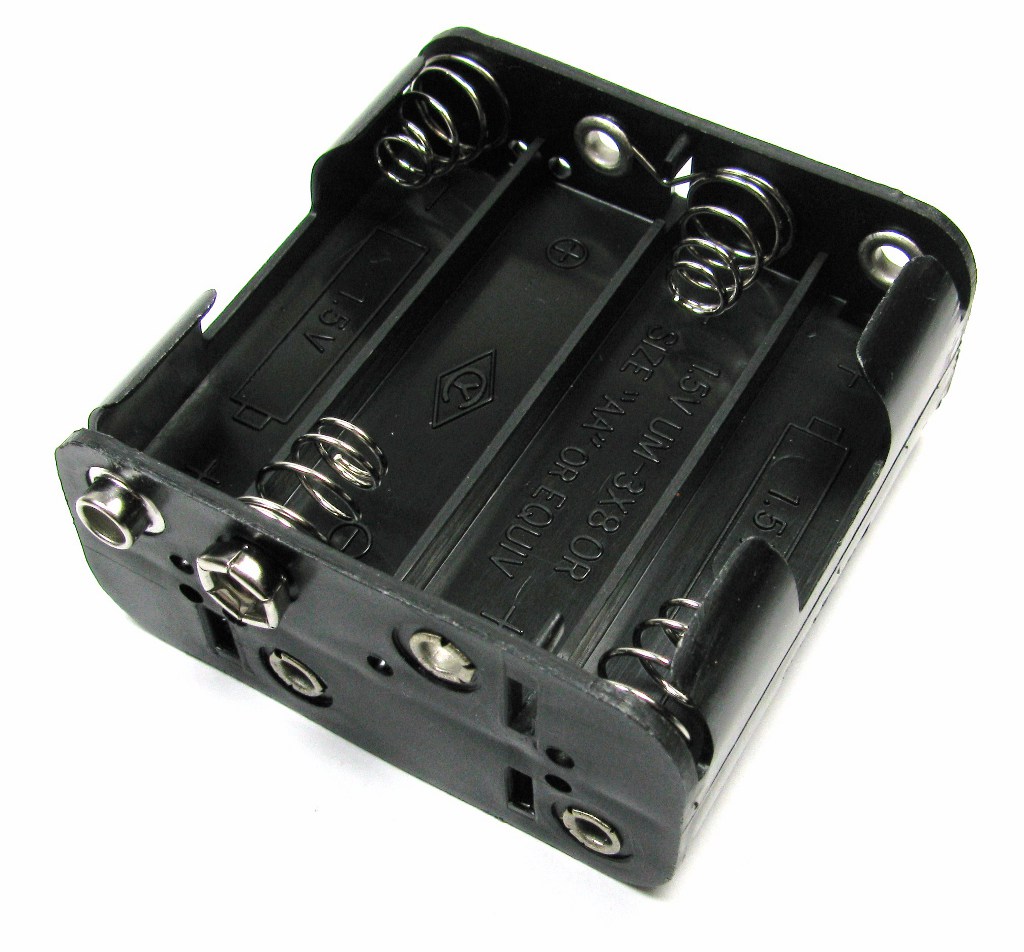
7) Nema17 Stepper motor (40 mm long) + Battery holder (8xAA)/ 12V Voltage source
8) Hot coffee when you go outside to take photos (not optional)
 The wood batten

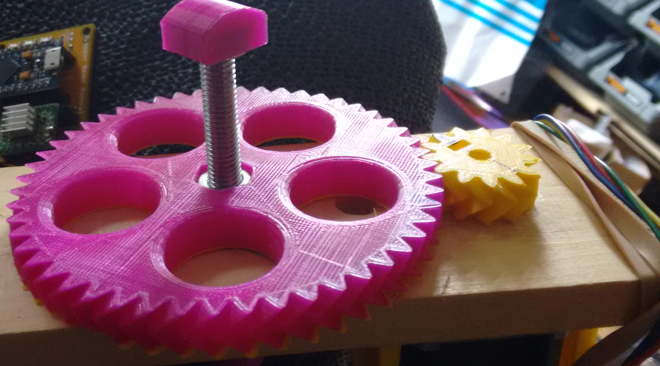
3D printed parts (you can print them by yourself or buy them in the SHOP)


b) Second step. Setting up all together (quite simple) :
Drilling holes on the batten:
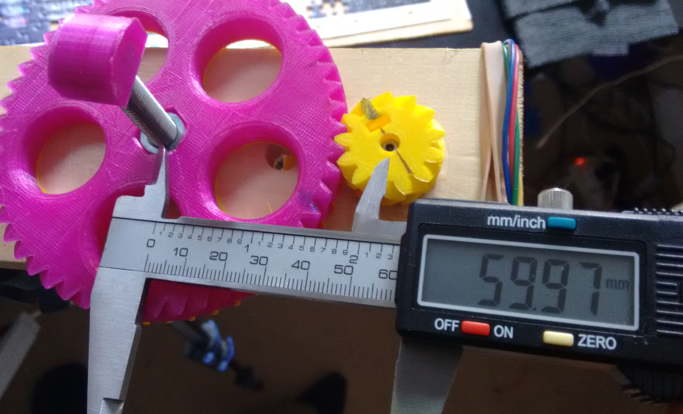
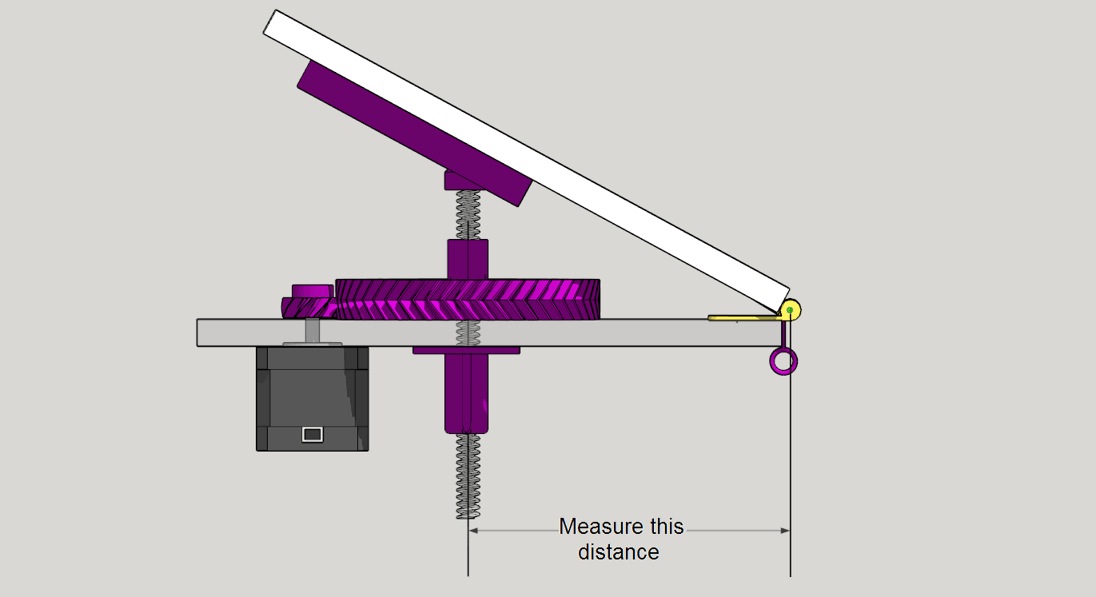
Make sure that the distance between the rod hole the the stepper motor axis hole is 60 mm (this value is fixed because the size of the gears we are using here). This is the only thing you need to pay attention on. All the other parameters can be adjusted in the arduino CODE (That means: you can drill the gears holes as far as you want from the hinge).
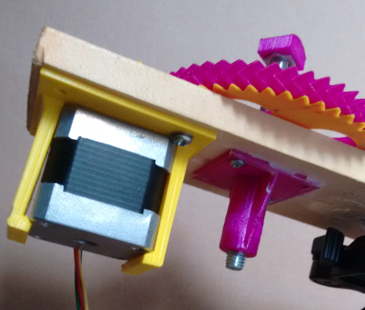
-Set the stepper motor in place (use the 3D piece that holds the motor tight).
-Put the small gear on the motor´s axis and pass the threaded rod through the large gear. Then, place the large gear next to the small one. Check the rotation of the gears.
– Glue the Plastic piece that works as a guide for the rod on the bottom face of the top wood batten (have a look to the sketch at the beginning of this step)

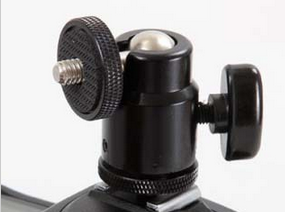
c) Third. the tripod and camera.
Test the balance and the general toughness.
d) Electronics and software (Arduino IDE)
1) Program the Arduino Leonardo (using the Arduino IDE) setting before two parameters in the code (you will need to measure the distance from the centre of the hinge to the middle of the hole of the threaded rod and the rod´s pitch) . Get the Github code here. If you have any question, go to the FORUM
Below, the beginning of the StarTracker CODE. In bold, the two parameters you have to set (according to your final set up):
//Theory behind this CODE
//—————————————–
// 360º (rotation of the Earth every 1436min, sidereal day, not regular day)
// *Using a M8 rod coming up 1.25mm every complete rotation
#define COMINGUPSPEED 1.25 //milimeters that the rod comes up every complete rotation (360º). In a M8 rod/bolt is usually 1.25 mm. In a M6, only 1.00mm
//other info needed:
//ratio between the large gear and the small one=0.2549
//MEASURE THIS VALUE AS GOOD AS YOU CAN AND SET THE LENGHT BELOW
#define LENGTH 228 //distance from the centre of the hinge to the centre of the hole for the rod in milimiters
// Calculus here:
#define STEP ((2*3.14159)/1436)*LENGTH //rotational velocity of the small gear
#define RPS (STEP/(60*0.2549))/COMINGUPSPEED //rotational velocity of the large gear
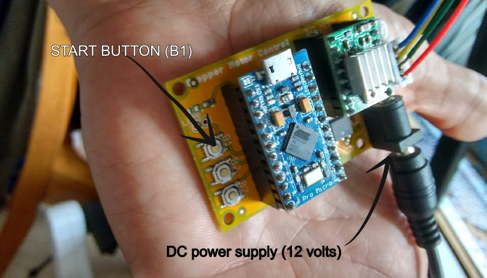
2) Connect the motor to the control board
3) Plug the batteries holder/ 12 volts power supply to the control board
4) press the START button (B1) and let the motor spin: Your StarTracker will move the upper wood batten at the right velocity following the stars. Time to take photos!
NOTE: Start to capture photos only after the motor has started to spin (2/3 seconds after). Otherwise, the vibration of the motor when starts will, create noise (the stars will shiver a little bit)
e) Go outside and take photos!! (take a look to the community for some recommendations)
 2015
2015
Did you like it? Subscribe jjROBOTS!NameEmail *