Go BACK TO iBoardbot assembly instructions
GO TO ´HOW TO CREATE A IFTTT RECIPE for my iBoardbot´
The iBoardbot WebAPP will let you control and share your iBoardbot. It is a web based application, so you can run it on almost every device (as long as it has internet access) and you do not need to be worried about compatibility issues or updating it.
Here is the frontpage of the WebApp:
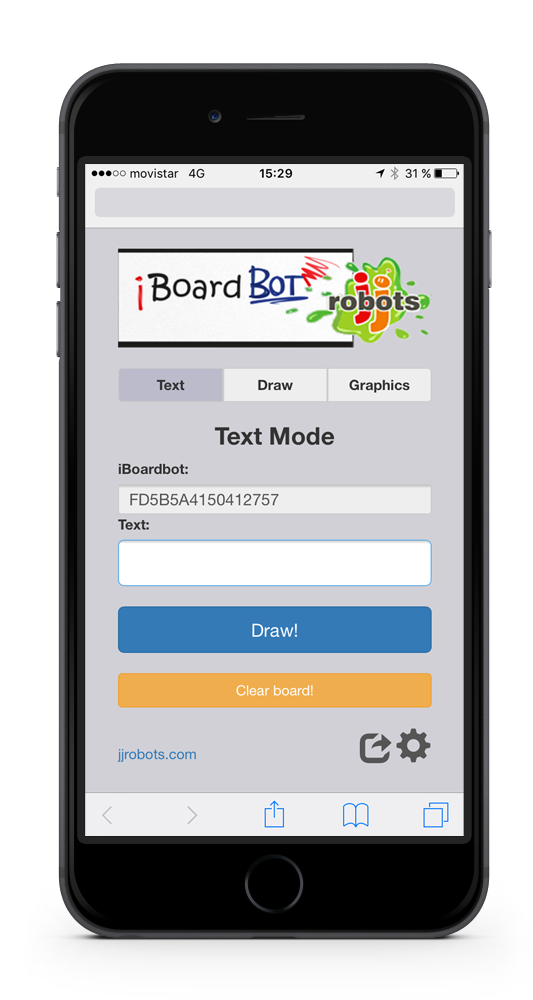
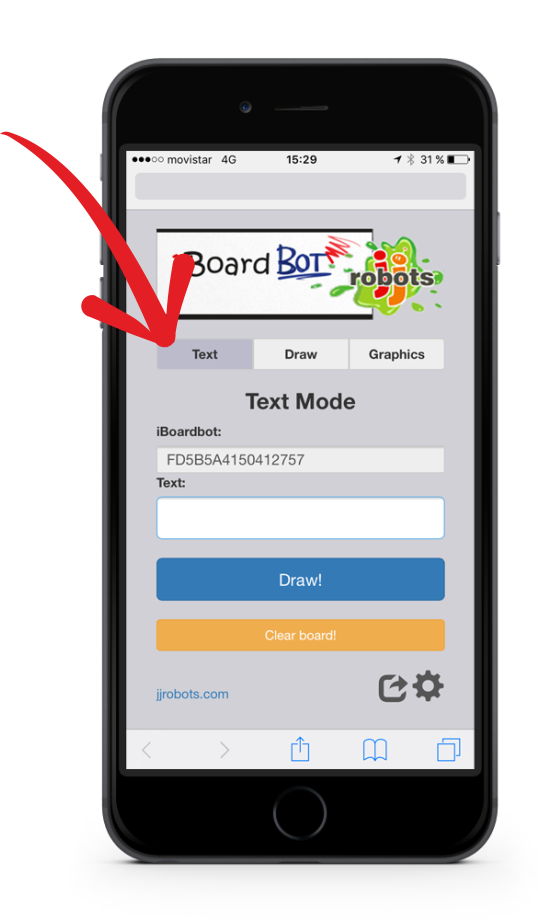
The main tabs are: TEXT, DRAW and GRAPHICS (on the top of the page). At the bottom: SHARE button (the square with the arrow) and CONFIGURATION (gear logo)
TEXT MODE:
Send any text. The iBoardbot will adjust it to the right size so it can fit on the board and it will draw it using its own font. Just type it and click/tap on DRAW!.
The CLEAR BOARD! button will PHYSICALLY wipe the iBoardbot
Procedure:
1. Type your text inside the TEXT field.
2. Tap/Click on the “DRAW!” button
3. Preview how the text will be sent in the PREVIEW window (it will appears after pressing the Draw! button)
4. If you want to wipe the iBoarbot, use the CLEAR BOARD! button
DRAW MODE:
It can precisely draw what you assign to it. Different users will be able to collaborate with the drawing at the same time from different devices and world places (see “how to share your iBoardbot” section below). No matter how far the drawer is; the drawing precision will be as if the drawer himself was holding the pen with his/her hands.
Some hits before starting drawing things:
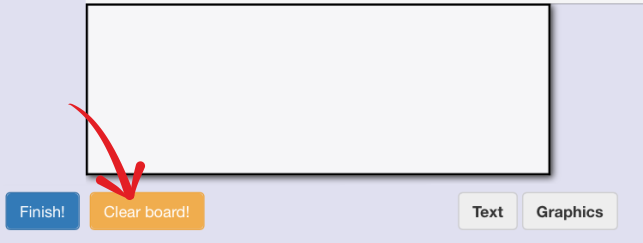
The CLEAR BOARD! button will PHYSICALLY wipe the iBoardbot
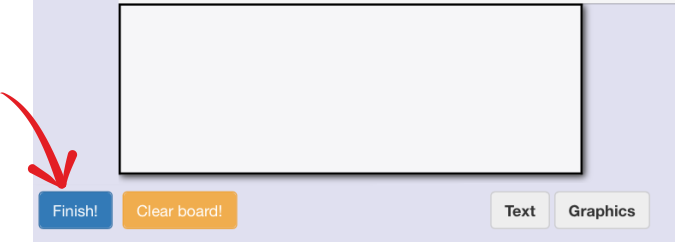 The FINISH! button will send the drawing header to the stand-by position (the lower-left corner).
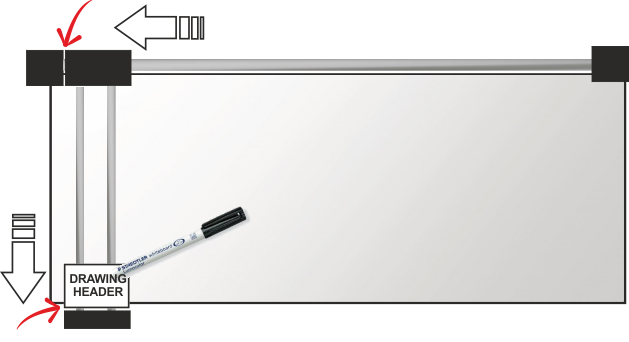 Above: standing-by position
NOTE: Even without tapping/clicking on the FINISH! button, the drawing header will come back to the stand-by position after 8 seconds.
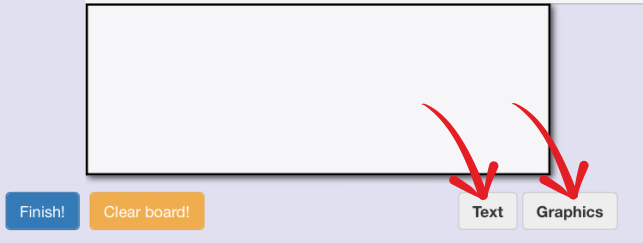
TEXT and GRAPHICS buttons will get you to the TEXT or GRAPHICS MODE (Who would guess that?!)
GRAPHICS MODE:
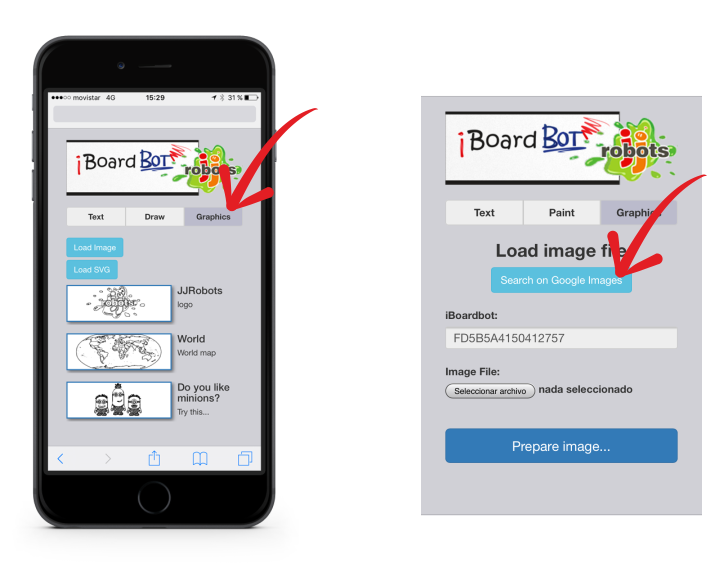
Pick a graphic from the online gallery where you can choose any previously uploaded designs (some more images will be added) OR you can also upload (using the “LOAD IMAGE” option) your own graphics after processing them using the integrated “vectorizer” tool (see details below)
Additional drawing option: Upload your own SVG file and draw it. Use the “LOAD SVG” button to send the SVG to the iBoardbot
Example:
- Pick any JPG or PNG image you want to process from internet ( “SEARCH ON GOOGLE IMAGES”) and download it.
- Select it using the “SELECT FILE” button and click/tap on “PREPARE IMAGE…”
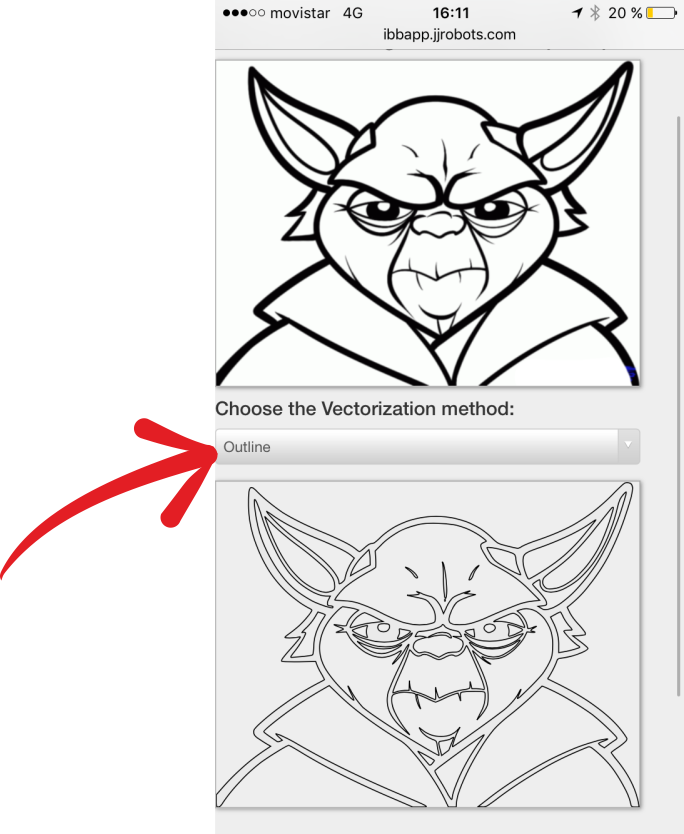
- Choose a vectorization method (5 available, the will behave distinctly depending on the kind of image you have selected)
- Click/ Tap on the DRAW! button to send the image to the iBoardbot (easy and quick!)
OPTIONAL: You can adjust the size and position of your image on the iBoardbot using the ADVANCED option (at the bottom of the page)
Some examples of images that can be easily vectorized :


HOW TO SHARE YOUR IBOARDBOT
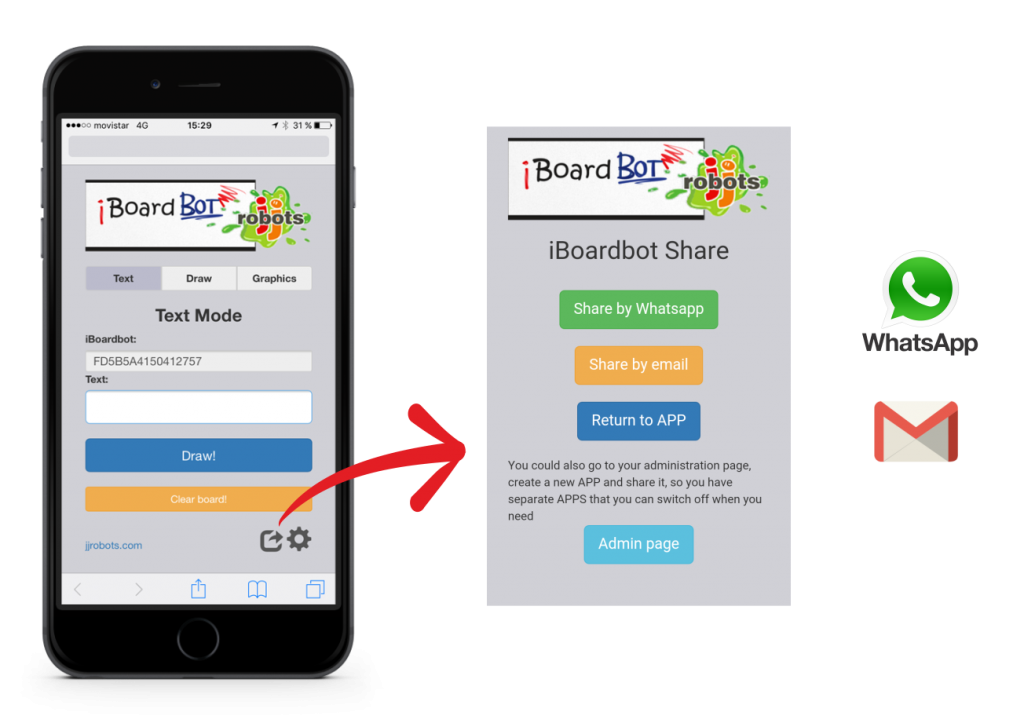
The easiest ways to let anyone draw/send texts/images to your iBoardbot: Send a whatsapp or an email with the direct link to your iBoardbot´s WebAPP.
How? Just go the SHARE page (see the icon below) and click/tap on the desired option. Easy! Now, the receiver will be able to draw on your iBoardbot
ADMINISTRATING YOUR IBOARDBOT
You can easily create direct “channels” to your iBoardbot. They are called “APPs“. Every APP will allow friends or others applications to access to your iBoardbot. The way to create them is simple:
1. First, access to your iBoardbot ADVANCED page:
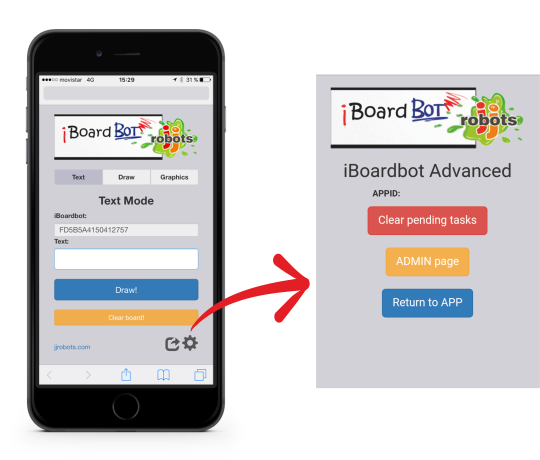
2. From here, you can CLEAR PENDING TASKS (clear the buffer of pending jobs), access to the ADMIN PAGE or return to the APP. Press the ADMIN PAGE button:
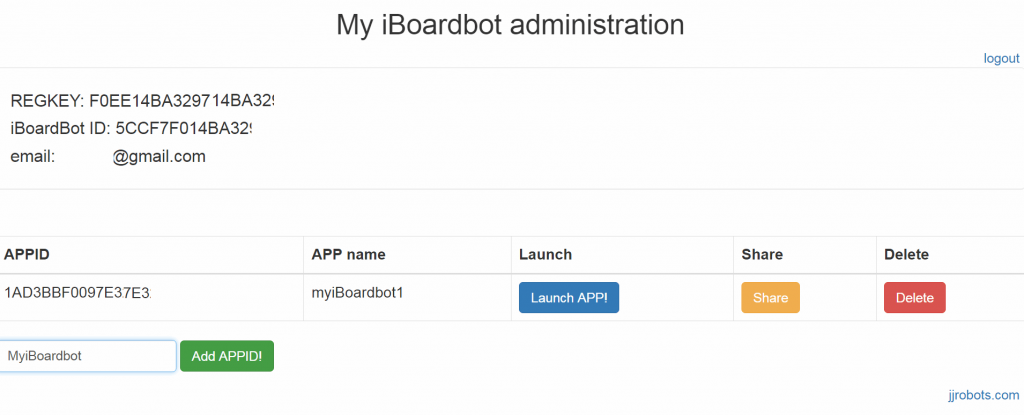
Above: what you should see (approx) after accessing to your administration page. Your REGKEY, iBoardbot ID, email and APPIDs are shown here. By default, there is one APPID already available, but you can create as many as you want just giving it a name and clicking on “ADD APPID!”.
For example (see below), I will give it the name “to share with my friends”. After clicking on “ADD APPID!”, this new APP will appear on the list. Now, if I want to share this new access “channel” to my iBoardbot with my friends, I just have to copy and paste the link that has popped up on the top of the page.
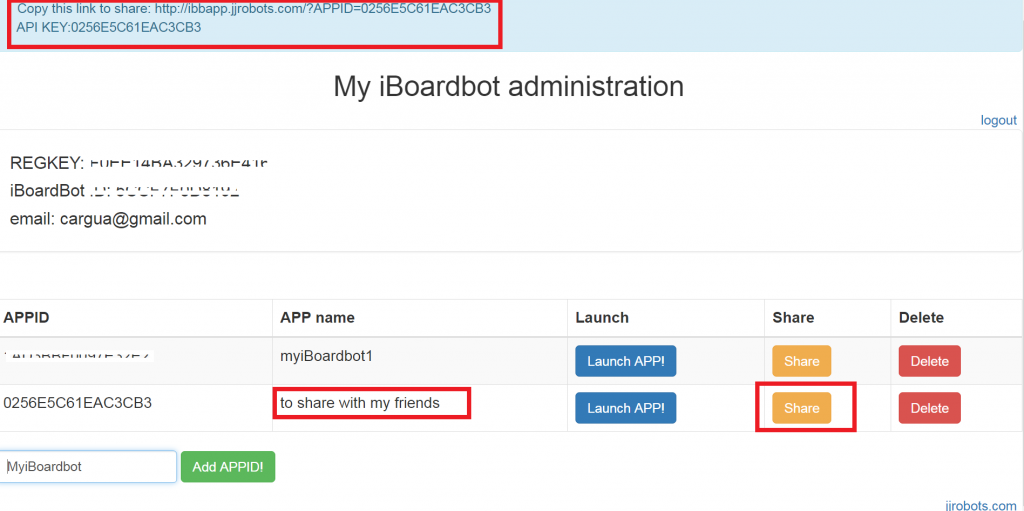
Alternatively, I can share it going to the just created APP using the “LAUNCH APP!” button and then pressing the SHARE BUTTON

Once I am done with this channel, I can get rid of it just clicking on DELETE.